Every time I step into my kitchen, the magical mix of chocolate and peanut butter calls to me. These rich, creamy flavors have been my comfort since childhood. They turn ordinary moments into special culinary adventures.
Your journey into chocolate peanut butter treats starts here. Whether you’re new to baking or a seasoned dessert lover, these recipes will open up a world of tasty possibilities. From quick no-bake desserts to rich spreads, chocolate peanut butter creations will soon become your kitchen favorite.
Imagine making irresistible treats that need little effort but taste amazing. Each recipe in this guide is easy, fun, and delicious. You’ll see how simple ingredients can make incredible chocolate peanut butter desserts that wow everyone.
Get ready to explore a collection of recipes that celebrate chocolate and peanut butter’s perfect mix. Your sweet adventure begins now!
Understanding the Magic Behind Chocolate Peanut Butter Combinations
Chocolate peanut butter is more than a tasty treat. It’s a mix that brings joy and creates a tempting indulgence for all. The blend of rich chocolate and creamy peanut butter is a perfect match that excites our taste buds.

Exploring chocolate peanut butter shows a fascinating mix of taste and texture. This favorite mix works because of how different ingredients come together in our senses.
The Science of Flavor Pairing
Flavor pairing isn’t just luck. Chocolate and peanut butter make a special taste experience. This is thanks to several important factors:
- Contrasting textures: Smooth chocolate meets creamy peanut butter
- Complementary flavor profiles: Sweet meets savory
- Balanced fat content that enhances mouth feel
Essential Ingredients for Perfect Results
To make great chocolate peanut butter treats, you need top-notch ingredients. Here are some tips:
| Ingredient | Recommended Type | Quality Indicators |
|---|---|---|
| Chocolate | Dark Chocolate (70% cocoa) | Rich flavor, fewer additives |
| Peanut Butter | Natural, Unsweetened | Minimal processing, pure ingredients |
Health Benefits and Nutritional Value
Chocolate peanut butter is not just tasty. It also has health benefits. Peanut butter gives you protein and healthy fats. Dark chocolate has antioxidants that are good for you. So, enjoying this mix can be both tasty and healthy.
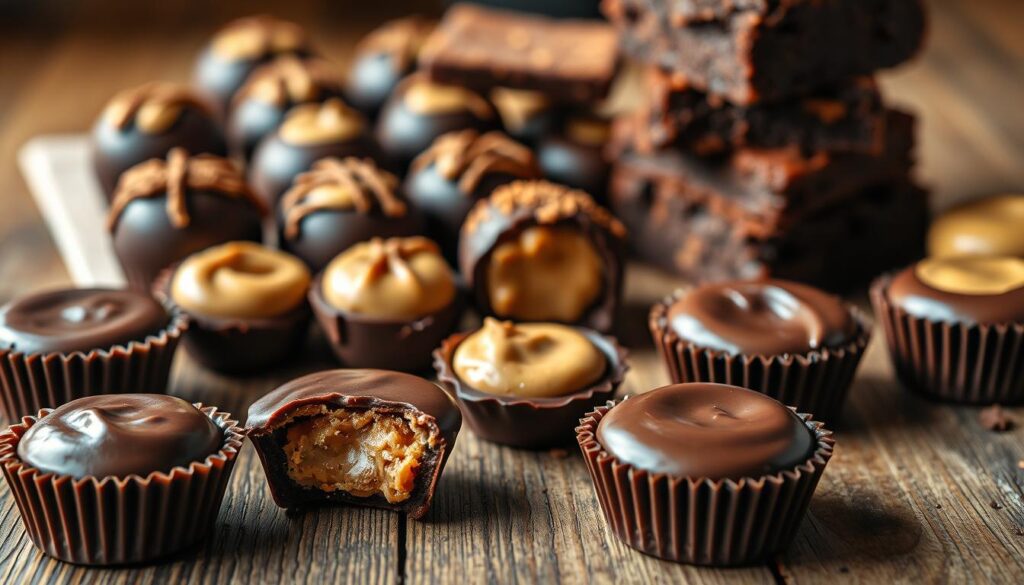
Classic No-Bake Chocolate Peanut Butter Bars

Craving a delicious treat that reminds you of Reese’s peanut butter cups? These classic no-bake chocolate peanut butter bars are your perfect solution. They’re incredibly easy to make, require no baking, and deliver an irresistible combination of sweet and salty flavors that everyone loves.
Creating these sweets takes just a few simple ingredients and minimal effort. You’ll be able to whip up a batch of delightful snacks in less than 30 minutes. This makes them ideal for quick desserts or unexpected guests.
Ingredients You’ll Need
- 1 cup unsalted butter
- 2 cups graham cracker crumbs
- 2 cups powdered sugar
- 1 cup + 4 tablespoons peanut butter
- 1½ cups semi-sweet chocolate chips
Simple Preparation Steps
- Line a 9×13 inch pan with parchment paper
- Melt butter and mix with graham cracker crumbs
- Add powdered sugar and 1 cup peanut butter
- Press mixture into prepared pan
- Melt chocolate chips with remaining peanut butter
- Spread chocolate layer over peanut butter base
- Refrigerate for 1 hour until set
These no-bake bars are perfect for summer when you want delicious desserts without heating up the kitchen. Pro tip: Cut into small squares for bite-sized treats that are sure to impress!
Tip: Store bars in the refrigerator for up to one week in an airtight container.
Decadent Fudgy Peanut Butter Swirl Brownies

Dive into the ultimate chocolate peanut butter dessert. It promises pure indulgence with every bite. These fudgy brownies mix rich chocolate with creamy peanut butter in a show-stopping treat.
Creating the perfect chocolate peanut butter brownies requires attention to detail. A few expert techniques are needed. The magic happens when you blend two beloved flavors into one irresistible dessert.
Mastering the Swirl Technique
Achieving a beautiful peanut butter swirl takes practice. Here are some pro tips:
- Use room temperature peanut butter for smoother swirling
- Drop spoonfuls of peanut butter on top of brownie batter
- Use a toothpick or knife to create elegant marble patterns
- Work quickly to prevent the batters from mixing completely
Texture Perfection
The key to fudgy brownies lies in careful baking. You want a center that’s just set but still soft. Avoid overbaking, which can dry out your dessert and rob it of that signature gooey texture.
Keeping Your Brownies Fresh
Store your chocolate peanut butter brownies in an airtight container at room temperature for up to 4 days. For longer storage, wrap individual pieces in plastic wrap and freeze for up to 3 months.
Pro tip: Let frozen brownies thaw at room temperature for the best texture and flavor revival.
Crispy Rice Chocolate Peanut Butter Treats
Looking for a quick and tasty treat? These crispy rice snacks are perfect! They mix chocolate and peanut butter in a crunchy, no-bake dessert.
Making these snacks is easy. You only need a few ingredients to turn crispy rice cereal into a hit treat.
Ingredients You’ll Need
- 6 cups crispy rice cereal
- 1 cup creamy peanut butter
- 1 cup chocolate chips
- 1/2 cup honey or corn syrup
- 1 teaspoon vanilla extract
Simple Preparation Steps
- Melt chocolate chips and peanut butter together
- Stir in crispy rice cereal
- Press mixture into a lined baking pan
- Refrigerate for 30 minutes
- Cut into squares and serve
These treats are great for any time – from snacks to holiday treats. Both kids and adults love the chocolate, peanut butter, and crunchy texture.
Tasty Variations
Try these fun mix-ins to make your treats even better:
- Sprinkle sea salt on top
- Add mini marshmallows
- Mix in chopped nuts
- Drizzle additional melted chocolate
Pro tip: Keep these snacks in an airtight container in the fridge for up to a week. But they might not last that long!
Quick and Easy Chocolate Peanut Butter Spreads
Do you love the taste of Nutella but want to make your own? Making your own chocolate peanut butter spread is simple. With just a few ingredients, you can create a treat that’s both delicious and personalized.
Smooth vs Crunchy Texture Choices
You can choose whether your spread is smooth or crunchy. The smooth version is creamy and slides well on toast or crackers. The crunchy version has roasted peanuts for a fun texture.
- Smooth Spread Benefits:
- Ultra-creamy consistency
- Easy to blend into recipes
- Perfect for spreading
- Crunchy Spread Advantages:
- Added nutty texture
- Extra protein boost
- More interesting mouthfeel
Creative Serving Suggestions
Your homemade chocolate peanut butter spread is very versatile. Here are some ways to enjoy it:
- Spread on warm toast or fresh bagels
- Use as a dip for fresh fruits like apples and strawberries
- Drizzle over vanilla ice cream
- Swirl into yogurt for a decadent breakfast
- Create quick no-bake dessert fillings
With these tips, your chocolate peanut butter spread will become a gourmet delight. It will add excitement to every bite.
Essential Kitchen Tools and Equipment
Making tasty chocolate peanut butter desserts needs the right kitchen gear. Whether you’re new or have lots of baking experience, the right tools make baking fun and easy.
Here’s what you need for making great chocolate peanut butter treats:
- Mixing bowls in various sizes
- Precise measuring cups and spoons
- Silicone spatulas
- Non-stick baking pans
- Digital kitchen scale
For more complex desserts, get specialized tools to improve your baking:
- Double boiler for melting chocolate
- Food processor for smooth spreads
- Parchment paper for easy removal
- Offset spatula for perfect swirls
| Tool Category | Recommended Items | Purpose |
|---|---|---|
| Mixing | Stainless steel bowls | Prepare ingredient mixtures |
| Melting | Silicone spatula | Smooth chocolate melting |
| Baking | Non-stick 8×8 pan | Create perfect dessert bars |
Pro tip: Choose quality tools that last. Stainless steel and silicone are great for durability.
Keep your kitchen tools in good shape. Wash delicate items by hand, dry well, and store in a cool, dry spot. This will make them last longer.
Tips for Working with Chocolate and Peanut Butter
Mastering chocolate peanut butter confectionery needs precision and understanding. Whether making sweets for family or professional treats, knowing how to handle these ingredients can boost your skills.
Working with chocolate and peanut butter requires attention to detail and specific techniques. Both professional bakers and home cooks must understand these ingredients’ unique characteristics.
Temperature Control Guidelines
Proper temperature management is key when making chocolate peanut butter desserts. Here are some strategies for success:
- Melt chocolate using a double boiler method to prevent burning
- Keep chocolate temperatures between 86-90°F for optimal tempering
- Allow peanut butter to reach room temperature before mixing
- Use a digital thermometer for precise measurements
Common Troubleshooting Issues
Even experienced confectionery makers face challenges with chocolate and peanut butter. Knowing potential problems can help you prevent and solve them quickly:
- Chocolate seizing: Caused by introducing water or overheating
- Peanut butter separation: Typically results from temperature fluctuations
- Inconsistent texture: Often due to improper mixing techniques
By using these professional techniques, you’ll make smooth, delicious chocolate peanut butter sweets. You’ll get consistent quality every time.
Creative Variations and Mix-ins
Make your chocolate peanut butter treats special by trying new mix-ins. These can turn simple snacks into amazing treats. The secret is knowing how to mix different ingredients with chocolate and peanut butter.
Here are some creative mix-ins to elevate your treats:
- Crunchy Additions
- Crushed pretzels
- Roasted nuts (almonds, pecans)
- Crispy rice cereal
- Sweet Surprises
- Caramel swirls
- Marshmallow fluff
- Dried fruit pieces
- Seasonal Variations
- Peppermint chips for holiday treats
- White chocolate drizzle
- Seasonal spices like cinnamon
Your creativity can turn simple snacks into unique desserts. Don’t be afraid to try new things. Sometimes, the most unexpected mix-ins make the best treats.
Pro tip: Always start with small batches when experimenting with new mix-ins to perfect your recipe!
Whether you’re making no-bake bars, brownies, or crispy treats, these mix-ins will make them stand out. They’ll be truly unique and memorable.
Conclusion
Your chocolate peanut butter journey doesn’t end here. You’ve learned about no-bake bars and decadent desserts. These recipes let you get creative in the kitchen.
By making chocolate peanut butter treats at home, you can create amazing experiences. You can make smooth spreads or crispy rice treats. Your kitchen is a place for fun and delicious experiments.
We encourage you to share your chocolate peanut butter creations. Post a photo of your favorite dessert and try new mix-ins. Connect with others who love sweet treats.
Great desserts come from passion, creativity, and enjoying the process. Your chocolate peanut butter journey is special. Enjoy every delicious moment.